|
|
|
After you have finished exporting your clients' list and setting up Client Track on your computer,
follow the instructions below to import your text/CSV file into Client Track. |
|
|
 |
|
Importing Your Clients Into Client Track |
|
|
|
|
Step 1 |
|
|
|
 |
|
|
|
 |
|
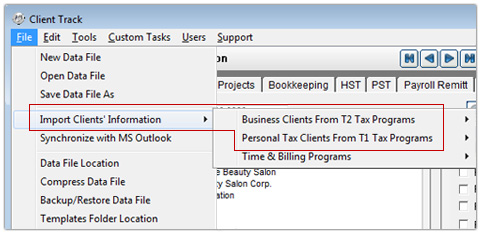
In menu, go to
File >
Import Clients' Information >
Business Clients From T2... |
|
|
|
|
|
|
|
In menu, go to
File >
Import Clients' Information >
Personal Clients From T1... |
|
|
|
|
|
Step 2 |
|
|
|
 |
|
|
|
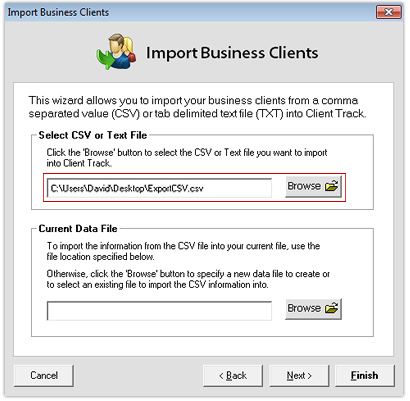
1) Click Browse and locate the
export file (.txt/csv) and click Ok.
2) Click Next. |
|
|
|
Step 3 |
|
|
|
 |
|
|
|
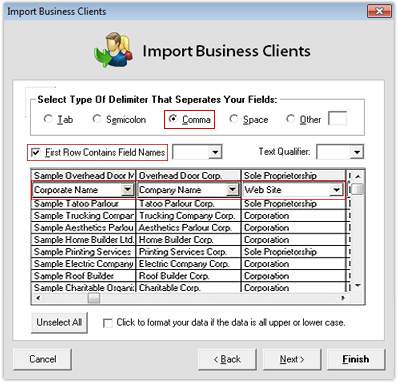
1) Select title for each column field from drop-down list.
2) Click Next. |
|
|
|
Note: If Yes, export
field names was checked off in Act! Export Wizard,
then check off
First Row Contains Field Names in Import CSV Wizard. |
|
|
|
Step 4 |
|
|
|
 |
|
|
|
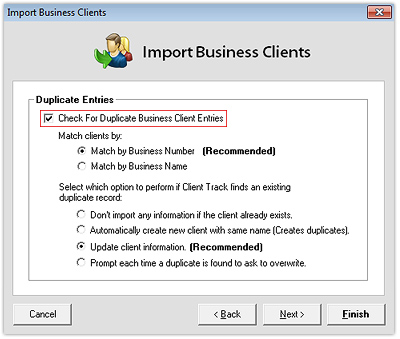
1) Check off Check for duplicate Company Name Entries.
2) Select which option to check for existing duplicate(s) specifically.
3) Click Finish to complete the import. |

