|
Before importing clients into Client Track, you must export your clients' information
first from selected software on left side and follow the instructions below. |
|
|
 |
|
Exporting Your Clients From QuickBooks Into Text/CSV File |
|
|
|
|
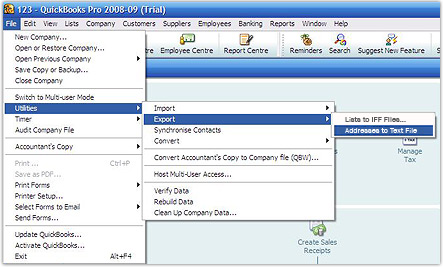
Step 1 |
|
|
|
 |
|
|
|
 |
|
In menu, go to
File > Utilities
> Export >
Addresses to Text File |
|
|
|
|
|
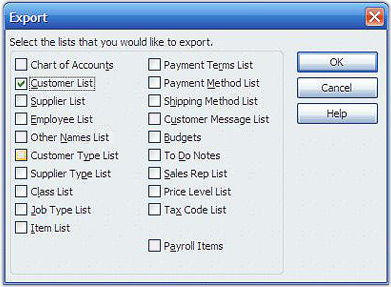
Step 2 |
|
|
|
 |
|
|
|
Check off Customer List and then click Ok. |
|
|
|
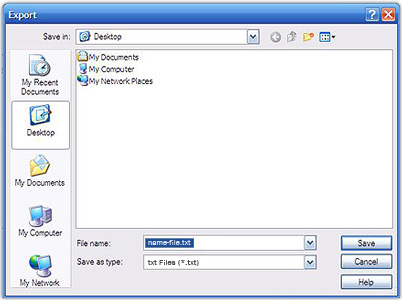
Step 3 |
|
|
|
 |
|
|
|
1) Create export file name and select txt files (.txt) from drop-down list.
2) Click Save. |
|
|
|
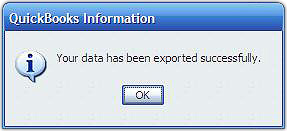
Step 4 |
|
|
|
 |
|
|
|
Click Ok after successful export. |
|
|
|
Step 5 |
|
|
|
To import QuickBooks export file into Client Track, follow the instructions
here. |

